australiansilkworm.com

home welcome 100s of links membership add url
events advertising contact us privacy login
index techniques stories newsletter tips
t e c h n i q u e s  4

Pop-up Index

Antifuse / Anti-spread

What does THAT mean?

So ... why would you want to "anti-spread"? Well, the purpose is to stop the dye flowing across the silk, if you want more control of how the paint spreads (or doesn't).

When would you use this? If you wanted to do fine detail (flowers, faces, intricate detail, bird feathers etc) this is a great way to achieve that.

And before you ask, yes, you can use more than one technique on a piece of silk! By that I mean you can use the usual quick-spreading silk paint, and when it is dry, you can put an anti-spreading product on (and allow it to dry) before you paint in the fine detail. How cool is that? You can also paint an entire piece of silk using the antifuse technique, whereby the dyes don't spread through the fibres.

Where did the "antifuse" word come from? From the French (who invented silk painting ... well, along with the Chinese) word "antifusant", which has been shortened in the translation to English.

How many types of antifuse are there?

Excellent question! There are tons, some tried and true, others waiting for you to imagine them, invent them and then try them. Some names are:
  • antifuse
  • anti-spread
  • stop-flow
Some techniques you can try are:
  • Essence F or spirit-based antifusant
  • Salt-water solution
  • Sugar syrup
  • Hairspray
  • Spray starch (avaiable in supermarkets, KMart, etc)
  • Magic Sizing spray (available in Target stores USA)

Things to think about ...

  • There are two types of silk paint - the transparent dyes which run quite freely, and the iron-fix dyes which don't move as easily across the silk.
  • There are two ways to apply your chosen antifuse - by cotton pad or by soaking the silk and then hanging it up to dry.
  • If the antifuse is a gutta-based product, it's best to apply with a cotton pad soaked in the liquid rather than by brush.

Making your own antifuse

1. Solvent-based

Although you can buy solvent-based antifuse in stores, you can make your own as follows:
  • six parts essence F
  • one part solvent-based gutta (you cannot use water-based gutta in this recipe)
  • pour into airtight glass container, shake thoroughly
  • test small piece of silk first
  • apply to silk, allow to dry (or use hairdryer)
  • Essence F evaporates, leaving a fine layer of gutta on the silk, similar to rice paper
  • paint your design
  • you can put many layers on top of each other using this technique
  • always be in a well-ventilated area when trying this technique
  • fix silk according to dye manufacturer's instructions
  • [excellent instructions can be found in Silk Painting - New Ideas & Textures by Jill Kennedy and Jane Varrell, Anti-Spread section]

2. Salt-water solution
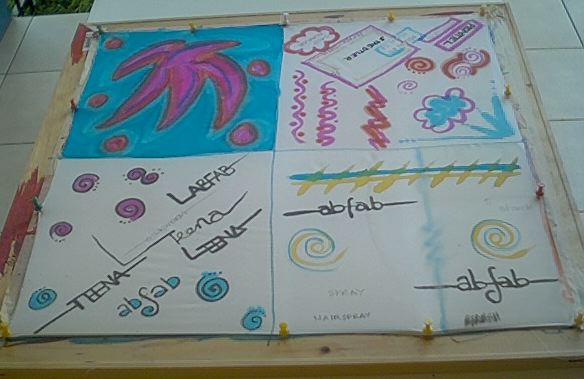
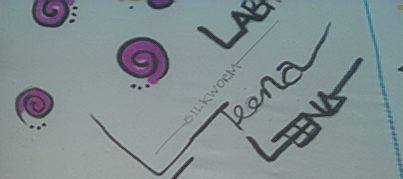
  • 250 grams of table salt
  • one litre lukewarm water
  • stir to dissolve, leave for about an hour
  • soak silk, hang to dry
  • or stretch on frame and apply with cotton pad, sponge or large soft brush
  • dry with hairdryer if you're in a hurry
  • when dry, you'll see little crystals sparkling on the silk
  • to paint, be careful not to put too much paint on the brush
  • fix silk according to dye manufacturer's instructions
NOTE: An experiment using different quantities of salt and water was done, with results shown below - click here.

3. Water-based gutta antifuse

Buy this ready prepared at your silk supply store, or make your own by adding water to some water-based gutta in a glass container. Follow drying and fixing required.

4. Iron-on Starch

Great results have been achieved by spraying the silk with iron-on starch.

You can also make a solution by mixing starch powder and water - mix to a thin liquid which will be a milky colour. Paint on with a brush, allow to dry, paint and fix as required. Note that results from this home-made solution are not excellent, but it's worth a try to see if it suits your purposes.

5. Hairspray

I have heard several silk artists say they find this a cheap alternative for an antifuse, but others have said it's really difficult to wash it out after steaming. I'll leave it up to you to try ...

After you've antifused ... make notes!

After you've put an antifuse on your silk, you can either paint on damp antifuse, or dry antifuse, the choice is yours. I suggest you try all the techniques, and don't forget to make notes in your Silk Notebook which should be in your workshop - if you make notes every time you try something new, you'll be able to go back to your notebook years later and have all your trials and triumphs detailed clearly. You can even put tiny samples of the silk in the book.

Good luck, everyone!

For more information on handpainting on silk, go to www.google.com and type your question - you'll be amazed at how many fabulous websites there are offering to show you how to do something new. If you'd like to recommend something new for this website, let me know!


top
 

Salt antifuse

My experiments with using salt as an antifuse were fascinating! Rather than using the solution suggested above, I decided to try my own ...

I made a solution of 50% table salt and 50% water, as follows:
  • wash and dry thoroughly a small jar with a tight screwtop lid
  • boil some water
  • pour salt in jar, covering about 1/4inch or 60mm
  • pour in boiling water to cover, also about 1/4inch or 60mm on top
  • shake and then leave for about a half hour to let salt dissolve
  • shake before using, there will still be crystals in the jar.
I set up a wooden frame using stretcher bars 24x24inch [54x54cm] and put masking tape around the edges where I wanted to pin the silk (this keeps the wood protected, and you pull off the tape when it gets too covered in paint - as you can see, I put the masking tape on after I'd used the frames!).

I stretched a piece of 8 mommie habotai, and with gutta I marked it into quarters - one for each experiment.

In the first and second sections I painted the salt solution all over the silk, in the third section I painted a few shapes with the salt solution, leaving some silk untouched. I left the last piece of silk unpainted.

When the solution was dry, I chose a fine brush and started to write and draw on the first section [Photo B], and was amazed at the fine lines I could create. A few swirls and the paint stayed where I put it, didn't spread, and I was pleased with the results. I did some more drawing on the second section to make sure the results were the same.

On the third section [Photo C], where I had made some shapes (a big leaf and a few circles), I picked up a normal sized brush and painted onto the salt shape (which was a bit hard to see on the white silk, but the salt crystals were visible). The thick line of colour stayed in place, so I continued to paint the rest of the square, and was fascinated to see how the paint reacted to the salt-covered silk and the untouched silk.

In the last photo to the right [Photo D], you can see a closeup of this painting - the halo shows where the salt outline is, and the unusual blending of colours painted on TOP of the salt solution are quite interesting. Once the silk is steamed and washed, we will be able to see just how that salt effect holds up.

I'm very pleased with the unusual results, and will steam this project and give an update in the next Newsletter.

If you have any questions or want to share your experiments, please let us know!
top
finished silk
A. silk in 4 quarters


salt technique
B. a fine brush was used to achieve fine lines
on the salt-antifused silk
the swirls were first painted with black paint as a fine line, then a slightly thicker brush with hot pink was drawn inside the swirl; as you can see, the paint didn't spread
it is possible to have excellent control with fine lines this way, although the silk is a little "crusty" with dried salt crystals


salt + silk
C. the flower and circles were painted/drawn with salt solution then dried, leaving lots of silk untouched; you can see the halo effect around the flower and circles where the blue is slightly lighter in colour


salt closeup
D. closeup


australiansilkworm.com has created
several Polls & Surveys ...
please fill them in and we
will share the results each month.
thank you!


AustralianSilkworm.com © 2003-2004