| home | welcome | 100s of links | membership | add url |
| events | advertising | contact us | privacy | login |
| index | techniques | stories | newsletter | tips |
|
|
|
|
|
t i p s & t r i c k s
why not share some tips and tricks with other Silkworm Members? - the simplest thing could help another artist. |
Steamer - StovetopThe most common steamer is a stovetop stainless steel one - once you've rolled the silk up ready to steam:
 Dharma Trading USA have info on building your own simple stovetop steamer - click here. Remember though that long pieces of silk which get folded in rolling will have permanent creases. For best results there should be no folds or creases when silk is put into any steamer.
Dharma Trading USA sell stovetop steamers - click here. [1/03] |
Steamer - UprightProfessional silk artists and others who do a lot of steaming find the upright steamer to suit their needs as it holds a lot more silk - once you've rolled the silk up ready to steam: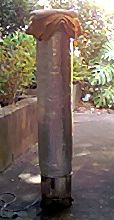
Dharma Trading USA sells stovepipe/upright steamers - click here. [1/03] |
Steaming - Paper vs FabricThe most common way of wrapping silk for the steamer is to use paper, either by the roll (left over rolls from paper mills & suppliers) or sheets of butchers' paper (available from Dharma Trading USA and other suppliers).An alternative and equally good way to roll silk is to use fabric INSTEAD of paper - that's right, a fine fabric which can be washed after each steaming session. I know of silk artists who use muslin [can be purchased in the USA for approx $US-6/yd or metre, 105" {266.7cm} wide]. Buy and cut the muslin to the width which fits into your steamer, and roll using the same technique as rolling paper. Once the steaming has been done, wash the fabric with bleach to remove all colour. The beauty of using fabric is that you can use it many, many times, whereas paper can only be reused a few times, and if it has gutta marks on it, shouldn't be used again in case those gutta marks transfer to the next batch of silk. [1/03] Make a steamer out of metal garbage can!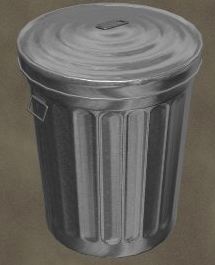 Sounds crazy? Well, it CAN be done! Check out the detailed instructions on the left-hand side of this page:
www.maiwa.com/Maiwacat08.html Sounds crazy? Well, it CAN be done! Check out the detailed instructions on the left-hand side of this page:
www.maiwa.com/Maiwacat08.html
On the right-hand side of the page is info on steaming in a microwave. This is an excellent site - check out the other links and spend a bit of time reading all the great information. There are several pages on stretching silk using a great variety of techniques - click on the links at the bottom of the page |
Steaming - bamboo steamer, stovetop, stovepipe?My aunt Ronda has had great success steaming using a bamboo steamer - I tried it once and it was a dismal failure. There are lots of tips and tricks to be discovered, and you'll eventually work out what suits you best and fits with your environment (small apartment, painting studio etc). I personally now have upgraded to an upright stovepipe steamer, which I place outside my back door (so it doesn't fog up my apartment!). [4/03]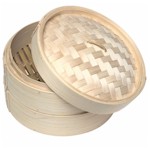 Steaming - old flannel sheetsOne silk artist I know uses old flannel sheets - cuts them lengthwise in half, making two long pieces, and wraps the silk in these. "After steaming, I wash out the strips thoroughly in the washer with some bleach and they're ready to be used again. No more buying paper! My dyes have been coming out beautifully. Don't know if it has anything to do with the cloth vs. the paper, but this has been a real boon to me." thanks Fred! [4/03] |
Why does silk get permanent creases in a bamboo steamer?A: If your bamboo steamer is say 12-14" [30-35cm] across, and you've painted a square scarf 36"x36" [90cm x 90cm], you're going to have to FOLD or BEND the scarf to make it fit into the steamer. Even if you lay it flat and roll it in paper or fabric, then gently place it in the bamboo steamer so it curves around the outside, it will create folds and creases (because it's not flat).TIP: If you're going to be painting scarves which are wider than your steamer, you might want to consider a different technique of steaming. [4/03] |
How long should I steam silk for?Always read the manufacturer's directions on the silk paint, to get an idea of what's recommended. I personally never steam for less than 3 hrs, I know other artists who never steam for more than 2 hrs - it depends on the brand of paint, and the quantity of silk. The more silk in the steamer, the longer it will take for the steam to penetrate, so if you've got a lot to steam, always allow more time. [4/03]Why use newsprint?You might read some instructions which say to use newsprint to wrap the silk in. What this means is old newspapers which have been left long enough (weeks) so that the newsprint doesn't rub off. It's cheaper than buying white butchers' paper. There is also a new printing ink based on soy, which doesn't come off on your hands - ecologically sound and you don't have to wait weeks for the ink to settle. Don't forget to try wrapping the silk in fabric, another good choice. [4/03] |
Steaming using the microwaveThere are quite a few silk artists experimenting with silk and the microwave, so here are instructions for you to experiment with microwaving your silk. I have two ways to try this - you will need to work out which works best for you.Experiment #1 Try this with a piece of silk or one scarf.
Ready to go into the microwave Experiment #2
|
Thumbtacks & ClawsThere are several ways to attach your white silk to frames, and I use two - silk claws and silk thumbtacks.I generally attach silk on two sides of a frame with thumbtacks [see photo below], then use "claws" or "suspension hooks" on the rest of the silk. 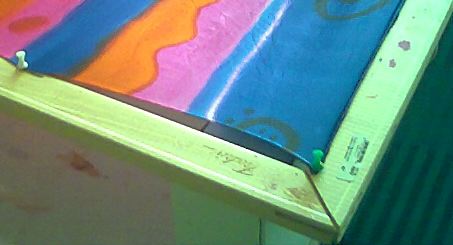
I never use three-pronged tacks as these are difficult to remove once the painting is finished. I find the thumbtacks with coloured plastic ends are easiest to use and to remove, but try them all and pick what's best for you. Silk claws are fantastic [see photo below] - instead of using rubber or elastic hairbands (as recommeneded), I tie 0.25inch [65mm] ribbon to one end of the claws, then cut a length about 12-14 inches which I then stretch out to the edge of the frame and hold in place with a coloured thumbtack. So easy to readjust when the silk is wet and you need to tighten the silk. 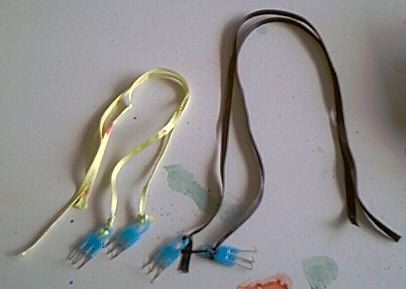
There are other methods and each silk artist finds which one suits them best, so experiment and let us know what works well for you - send photos if you have any. 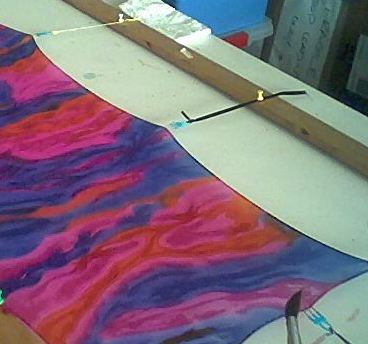
Using silk claws |
Care of your paintbrushesYour paintbrushes are the magic wands for painting on silk, and should be treated as special as all magical items. If you wash and care for your brushes, they'll give you years of use and be your faithful assistant.I was given several brushes when I first started painting on silk in Paris in 1981, and to this day, I still use those brushes and I treasure them. I have also purchased some very good brushes [squirrel? fake?] which also do a fabulous job. The brush should always feel supple and soft to the touch and bend easily if you pressed the bristles/hair against your hand. To wash the brushes at the end of a painting session, I hold them under running water and squeeze the section where the brush meets the handle, sometimes this is a metallic section, to ensure all paint washes out - ensure the water runs clear. I often use warm water, but never boiling water. To be absolutely certain there is no dye or paint in the brush, put a cake of soap in the sink and drizzle water on it, then gently place the brush down on the soap; swizzle it around until you get a slight froth, massage the brush with your hand and hold the brush under the running water until it runs clear. I store the brushes standing upright, wooden end in a jar, until I'm ready to use them again. 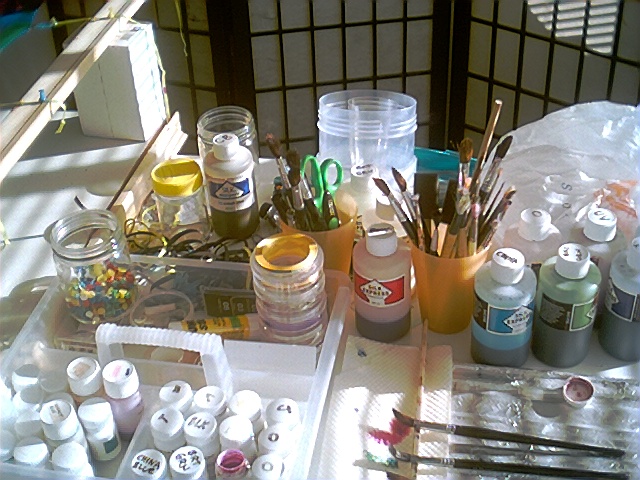
|
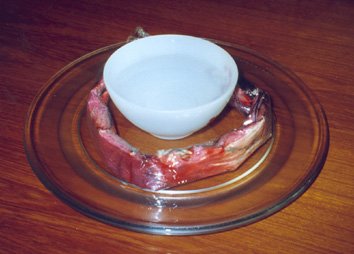
Paintbrushes while you workWhen I'm working on a piece of silk to paint, I like to have a small tray on my work table where I can rest the paintbrushes when I don't need them.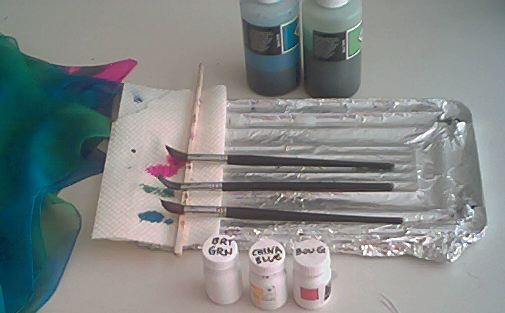
|
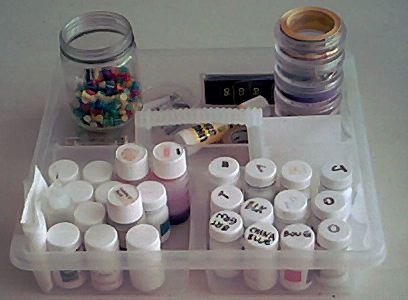
Storing paints in small containersWhen I paint on silk, I always hold 2 (and sometimes 3) small plastic containers in one hand, and a paintbrush in the other. This enables me to paint quickly without having to pickup and put down larger bottles of paint as I work on a piece of silk.This works very well for me, and might just work for you ... I buy small plastic bottles (white or clear if you can get them) with waterproof lids (essential), and I always have a few sheets of sticky labels in my Studio. I write the name of the colour on a label in big letters and then put it on the outside of the bottle; plus I put a splash of the paint on the white label so I can easily see it next time I use it. 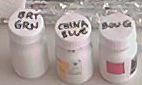 I also write the colour name on the LID of the bottle, so when a dozen small bottles are in a box or container, I can easily see which bottle to pull out next.
I have a small table in my workroom, at the end of my trestle table, which is covered in white plastic. This is where I keep all the paints I'm using, the brushes, the brush tray, paper towel etc. I can easily top up the small bottles as I work, always ensuring I put the lids back on the larger bottles as soon as I've finished ... this is accident-proof. The small white or clear bottles can be easily carried in a plastic carry tray or plastic shoe box, and remember to always make sure the lids are tightly closed. |
 |
Scissors for SilkThe scissors you use for cutting silk should be good quality seamstress or tailor scissors, available at sewing machine and haberdashery outlets.Over the years, I have decided to keep one pair of scissors to be used ONLY on silk and silk-related items like cotton thread. I have regular scissors in my office for paper cutting, and I have another pair of scissors in my sewing box which I use for all other fabric. Having one pair exclusively for silk means they are always in my silk painting area at home, they are always sharp, and they do a great job. If you haven't ever been told you should never use the same pair of scissors on fabric and paper, then today's your lucky day! Cutting paper and other scraps of card etc blunts the scissors, and you should keep at least one good pair for fabric, and another pair for paper. |
Hemming and finishing silkSilk is such an exquisite fabric, much stronger than many people realise, and can be used to create beautiful scarves and wearable art.The one area which really needs care is the hemming of the silk. If you buy silk by the metre and then paint and cut into scarf lengths, you will need to give serious thought as to how you want to hem the silk. Zigzag stitching can look unprofessional and cheapen an article, so think twice before you ever use this. Scarves can be purchased worldwide with hand-rolled hems, which are beautifully finished and give the absolute best impression. Wearable art can be finished off in several different ways, depending on the type of silk used. If no hand rolling available for HEMS, try this for Silk Chiffon, Habotai etc:
Your completed silk article will be judged by the way it is finished - give serious thought as to how you want to present your work. |
Stretch small pieces of silkSometimes you might need a small piece of silk for a project and don't want to stretch a large piece on a frame, or you might have a small piece and don't know HOW to stretch it to paint on it because it's too small for your frames.The easiest way around this is to use sewing pins to attach strips of old fabric to the edge of the silk and the frame with pushpins. Ideally, make up a small frame (if you have wooden stretcher bars this is easy), and attach the silk piece to the wooden frame along two sides which meet in a corner. Cut some lengths of old cotton, sheeting, any kind of fabric which will stretch from the edges of the silk to the wooden frame, allowing about an extra inch or 2.5cm to give you a bit of leeway. Start at the opposite corner to the one which is already attached to the frame, and hold one end of the fabric UNDER the silk and then use one straight dressmaking pin to attach it to the silk. Now stretch this strip out to the frame, and attach with a pushpin, keeping the silk tight and taut. Repeat this as many times as you need around the remaining two sides of the silk until it is all stretched and pinned to the frame. Easy! TIP: When you paint the silk, the fabric strip underneath will of course end up with paint on it. Make sure you wash these strips after use so there will be no transference of dye next time you paint using these strips. Photos at right: |
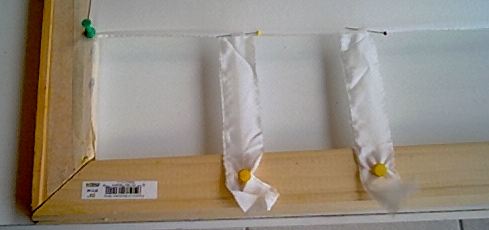 this is a strip of old silk about 1" [2.5cm] wide, pinned UNDER the silk, and attached to the wooden frame with a pushpin 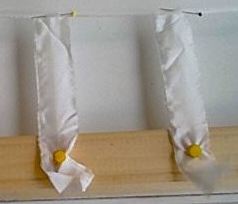
closeup - it's really very easy, just cut the lengths of strips long enough to reach the frame with a bit left over so you can use it again for other lengths |